Sunday, December 30, 2012

The Miso Soup Cure


I love the holidays, especially the part about hanging out with friends and family, but even the best Christmas is something of an ordeal, and tonight we Lovesmith's are a bedraggled bunch, worse for wear from travel, sleep deprivation, head colds, and days of eating food we don’t usually eat. Some of us are also feeling the effects of those extra swigs of whiskey.

It’s the perfect night for a miso soup dinner. Miso soup does all kinds of magical things; it detoxifies and alkalizes the blood, soothes digestion, stimulates the immune system and in general straightens a body right out. You can read about its health benefits all over the place, including here and here.

I have been making miso soup for years, ever since a six-month stint living at the Kushi Institute, a macrobiotic community and study center (more on this in future posts), but it’s always turned out meh, at best. Henry and I decided that our next stretch of cooking lessons will focus on soup-making, and we agreed that the first order of business was to develop an excellent miso soup recipe. We imagined a series of test kitchen experiments, pot after pot of soup until we got it just right.

But before we even began, my friend Josh gave me his vegetarian adaptation of his Japanese grandmother’s miso soup recipe. When somebody gives you his grandmother’s recipe for something, rejoice. Rest assured, you're in for something good.

I made Josh’s soup for my family and it was an immediate hit. Jonah, home for the holidays from the University of Illinois, gave it his supreme compliment: “This tastes like restaurant miso soup!”  And so ended our very, very short search for the perfect recipe, and even better – Josh gave me permission to share it with the world.


Miso Soup 
4 servings

1 piece dried kombu *
4 dried shiitake mushrooms
1 handful dried wakame *
2 scallions, green parts sliced into 2-inch pieces, white parts slivered
1 package firm tofu, cubed.
4 tablespoons miso (Josh uses a combination of white and red miso, and I did the same - I think that using two different types of miso is part of what makes this soup so full-bodied).

* kombu and wakame are seaweed, readily available in health food stores and Asian markets


Put kombu, shiitake mushrooms, and 6 cups of water in a pot. 
Bring to a boil and simmer 25 minutes.


While the broth is simmering, chop tofu and scallions.


Soak wakame in water to rehydrate. 


Measure miso into a bowl or cup.


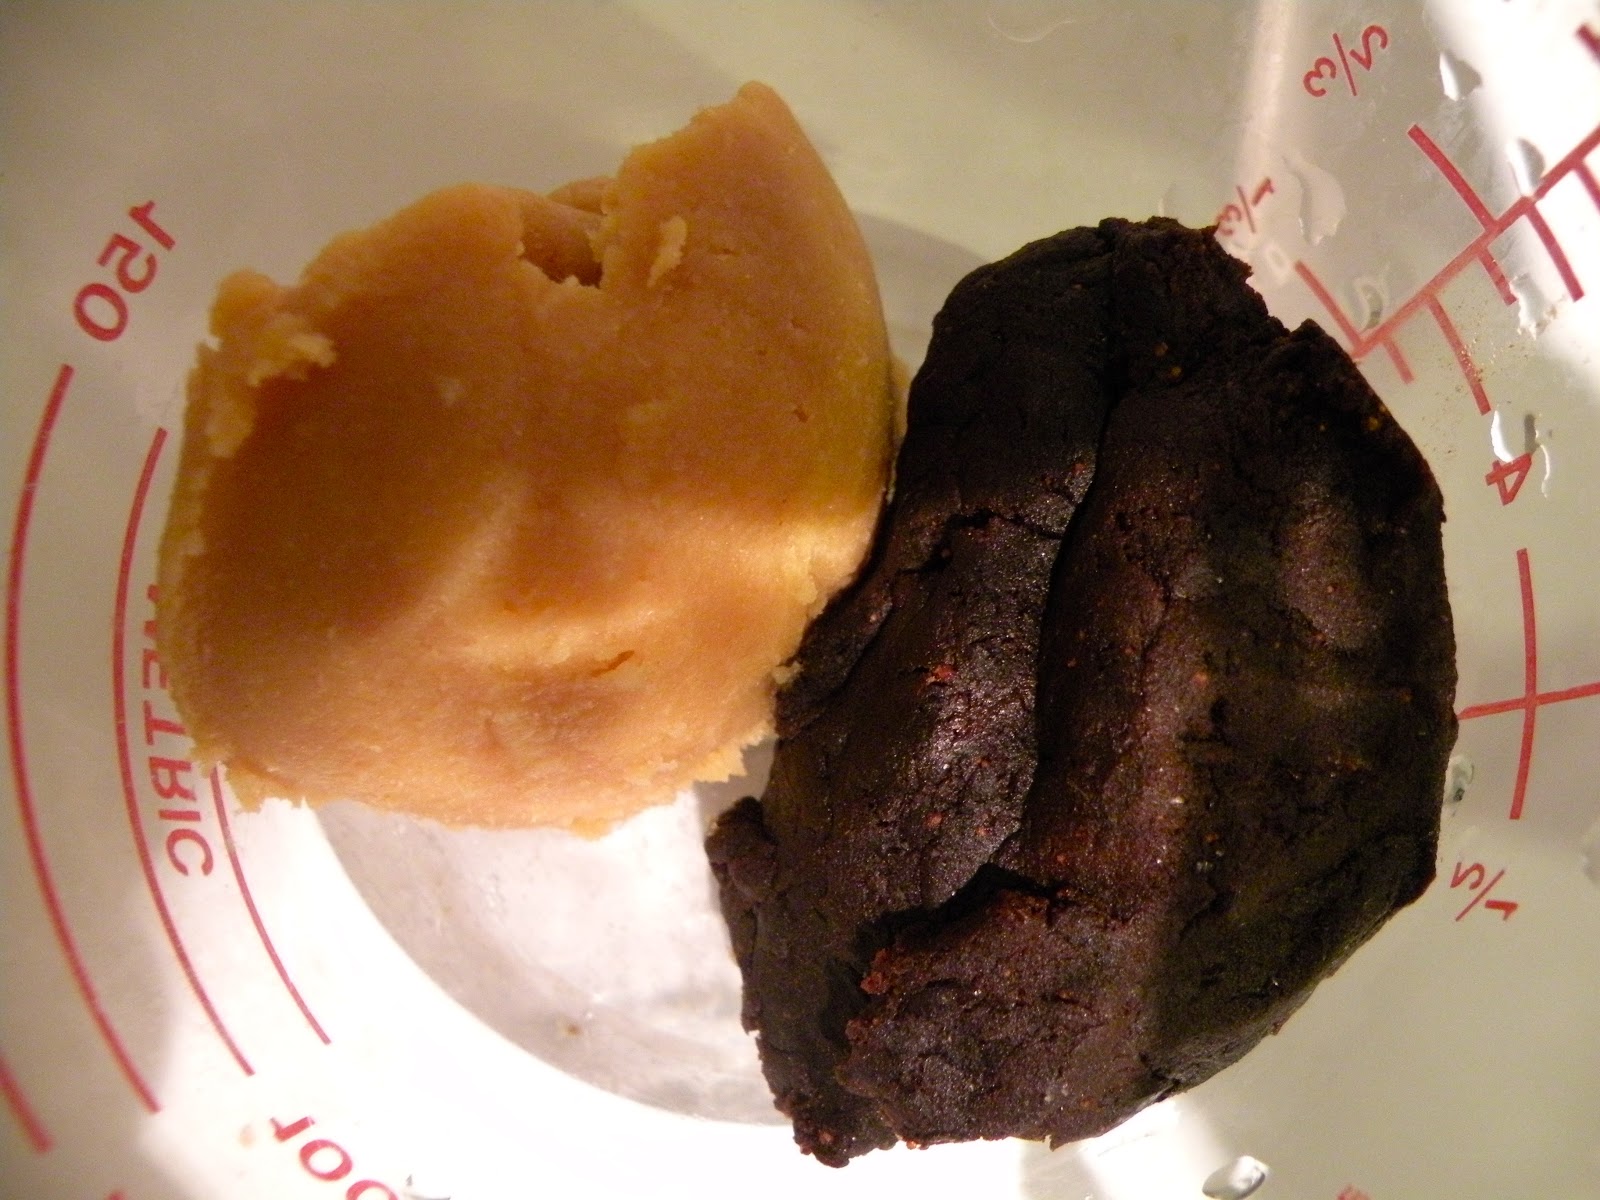
Scoop out a little hot broth and add to miso. Stir well with a fork to blend into a smooth mixture.


After broth has simmered 25 minutes, remove kombu and shiitakes from stock.
Save for another use or discard.


Pour soaking water off wakame and chop into small pieces. 
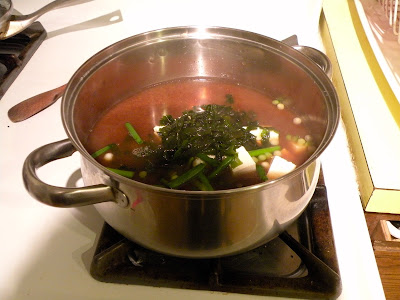
Add wakame to simmering broth along with dissolved miso, scallions, and tofu. 
Cook at a low simmer (you don't want to vigorously boil miso) for five minutes.


Josh recommends serving with a side of white rice. I agree wholeheartedly. 
Add a bowl of steamed veggies to make a complete meal, light but thoroughly satisfying. 
And if my family's response is any indication, people adore meals composed of food in little bowls.


All the best for a happy, healthy new year!


Monday, December 17, 2012

Deck the Halls with Salad Dressing


I made brownies last night. Henry and I are making Christmas cookies this afternoon. Next weekend, I'm baking two pies. At every turn, people are handing out sweets, and it's great fun, but I'm already a little burnt-out on sugary holiday treats, not to mention a bit compromised in the immune system, and my cells are craving vegetables. So although we don't usually eat a lot of salad in the winter, I've been making salad for dinner this week - salad with cooked green beans and olives, with roasted beets and goat cheese, with blanched cauliflower and homemade croutons, with potatoes, with tuna, with roasted pecans.

These salad meals gave me a chance to teach Henry how to make a few simple dressings. After all, a chef I know includes vinaigrette as one of the ten basics that every kid should learn. This also gave me a chance to teach Henry the word "emulsify." Such a great word.


Basic Vinaigrette

4 tablespoons olive oil
2 tablespoons vinegar or lemon juice
1 clove garlic, pressed or minced very finely
1 teaspoon dijon mustard
1/2 teaspoon salt
pinch black pepper
Optional: fresh or dried herbs (thyme is good) to taste

Combine vinegar, salt, and pepper in a mixing bowl and whisk until the salt is dissolved (takes less than a minute).

Add dijon mustard and whisk to combine.

Add olive oil in a steady stream and whisk until emulsified.

Add garlic and optional herbs. Taste and adjust seasoning.


Roasted Red Pepper Vinaigrette

4 tablespoons olive oil
2 tablespoons red wine vinegar
1 clove garlic
2 jarred, roasted red peppers
1/2 teaspoon salt
1/2 teaspoon honey

Put all ingredients in a blender and blend until very smooth. Roasted Red Pepper Vinaigrette is gorgeous and delicious. People freak out over it.


Creamy Garlic Dressing

1/4 cup mayonnaise or vegan substitute
1/4 cup greek yogurt or vegan substitute
2 tablespoons olive oil
2 teaspoons lemon juice
1/4 teaspoon salt
pinch pepper
2-4 cloves garlic, pressed or very finely minced
1 teaspoon Worcestershire sauce, regular or vegetarian

Combine all ingredients except olive oil in a bowl or blender. Whisk or blend to combine.
Add olive oil in slow steady stream and whisk or blend well.
Tastes even better a few hours after you make it.

(For a creamy green-goddess-ish dressing make creamy garlic dressing in the blender and add a small handful of parsley, spinach, basil, or a combination.)


Tahini Dressing (adapted from May All Be Fed by John Robbins)

1/4 cup lemon juice
1/4 cup olive oil
1/4 cup soy sauce
1/3 cup tahini
1 tablespoon chopped onion
1 garlic clove
1 tablespoon maple syrup or honey
2-4 tablespoons water
optional: pinch of cayenne pepper

Combine all ingredients except water in a blender and blend until smooth. Add water until desired consistency is reached.
Tahini dressing is good on steamed vegetables, especially broccoli, as well as on grains or noodles.

Monday, December 10, 2012

Vegan Butternut Squash Ziti


We are not a vegan family - our diet includes fish, cheese, and eggs - but we're part-time vegans, eating a few completely plant-based dinners every week. I like the challenge of coming up with healthier versions of traditional comfort-food favorites, and this Butternut Squash Ziti recipe was the result of an extended and ultimately failed attempt to make a delicious vegan macaroni and cheese. As I gradually gave up on making a mock (it was more a mockery of) mac and cheese, Butternut Squash Ziti began to come into its own.

This is a fun recipe to make with a kid, a great one for practicing tasting and adjusting seasoning (Henry, like me, loves cayenne pepper and tends to add an extra pinch), for encouraging experimentation (it took multiple tries to get this right, we ate quite a few okay-not-great versions along the way), and the sauce was a nice spin-off from our recent white sauce lessons. Butternut Squash Ziti is satisfying, creamy and rich, a good comfort-food substitute for macaroni and cheese, not an inferior imitation.

Vegan Butternut Squash Ziti
8+ servings

1 lb ziti or penne

1 large butternut squash (3.5 - 4 lb)

1/3 cup nonhydrogenated margarine (like Earth Balance) or olive oil

1 medium yellow onion, very finely chopped

3-4 medium cloves garlic, minced or pressed

1/4 cup white or whole wheat pastry flour

 2 teaspoons salt

1 teaspoon thyme

1/2 teaspoon white or black pepper

big pinch cayenne pepper

big pinch sage

1 cup unsweetened soy milk or almond milk

1 cup water

1 can coconut milk (14 oz)


For topping:

2 1/2 cups breadcrumbs

1/4 cup nonhydrogenated margarine or olive oil

1 teaspoon rubbed sage

1 teaspoon oregano

1/2 teaspoon paprika

big pinch each salt and pepper


Preheat oven to 375

Cook pasta according to package directions, drain, rinse with cold water, and set aside.

Butternut squash sauce:

Cut the butternut squash in half lengthwise (keep seeds intact) and place face down on a cookie sheet. Bake for approximately 1 hour, or until easily pierced with a knife and slightly bubbling. When squash is cool enough to handle, scoop out and discard seeds and pulp. Puree about half the squash in a food processor or blender. Save the un-pureed squash, you're going to use it, too.

Heat margarine or olive oil in a large heavy pot. Add onions and a pinch of salt, cook over medium-low heat until very soft, sweet, and slightly golden. This takes at least 15 minutes! If you rush the process, you're only robbing yourself. Add garlic and cook, stirring, for an additional minute or two. Stir in salt, pepper, thyme, cayenne, and sage.

Add flour and cook over medium-low heat, stirring constantly, until flour smells nutty and toasty, about five minutes. Whisk in soy/almond milk and water, a little at a time, then whisk in coconut milk. Bring mixture to a simmer and stir constantly until sauce begins to thicken.

Add pureed squash and stir well. Use a spoon to scoop bite-sized pieces of the un-pureed squash into the sauce (I like the look and texture of this dish best when it's not all smooth - the chunks of squash look pretty and add interest). Let simmer for about 15 minutes, stirring often.

Taste and adjust seasoning. More cayenne? Wish there was some nutmeg in there? Love black pepper and can never get enough?

Add cooked, drained pasta to pot and stir well to combine. Transfer mixture to  9 x 11- inch casserole.

Breadcrumb topping:

Heat margarine or olive oil in large skillet over medium heat

Add breadcrumbs, herbs, and spices and stir to coat for 3-4 minutes. Taste and adjust - might need more sage or salt?

Spread breadcrumbs on top of pasta.

Bake for 30 minutes, and cool for at least 10 minutes before eating.
Leftovers are excellent.


Wednesday, November 28, 2012

The Virtues of White Sauce (and swearing at your kids)


For the past eighteen years I've strenuously steered myself away from swearing around my kids, but now that they're teenagers, I've relaxed my efforts and allowed my language to be a little more natural.

Like when I was teaching Henry how to make white sauce. His first attempt had been a floury, lumpy fiasco. This was his second try, and I wanted him to get it. "You've got to show it who's boss," I told him, "you've got to whisk the hell out of it!"

He emitted little sparks of glee at hearing me say a bad word, and something seemed to click in him. He whisked the hell out of it, and the results were gorgeous, a smooth, satiny white sauce.

We've focused on sauces for most of our first cooking lessons, an approach I've borrowed from the curriculum at Le Cordon Bleu. I worked as an English instructor at Le Cordon Bleu in Chicago a couple of years ago, teaching Composition to future American chefs and bakers, and I learned from my students (wonderful students! Some serious potty mouths on them, though) that much of their initial course work was in knife skills, broths, and sauces.

Henry and I have worked a bit on knife skills (see The Tao of Broccoli), we've made one broth so far (see the kombu/mushroom broth in Fast Food), and we'll be delving into these areas more soon. But he is coming along nicely as a junior saucier. He can make a basic red sauce, adaptable for any pasta dish, and convertible - with a change of spices - into enchilada sauce. He can make a pesto out of herbs and vegetables to use as a dip, spread, or pasta sauce. And now he can make a white sauce, the foundation for countless treats: cheese sauce, nacho dip, butternut squash sauce (our favorite fall recipe for Butternut Squash Ziti is coming in the next post), or spinach dip. Henry singlehandedly made this obscenely rich and delicious dip for our family on Thanksgiving.

We ate the hell out of it.

Spinach Dip 

1.5 lb fresh spinach, washed, stems removed

2 tablespoons butter or olive oil

4 medium cloves of garlic, minced very fine

2 tablespoons flour

1 cup 1/2 & 1/2 or non-dairy substitute

1/2 cup grated parmesan cheese or non-dairy substitute

1 teaspoon fresh lemon juice

1/2 teaspoon salt

1/4 teaspoon paprika

pinch each of oregano, basil, thyme

3 tablespoons sour cream or non-dairy substitute


Cook spinach in boiling water for 1 or 2 minutes, just until it's all wilted. Strain well and squeeze out excess water. Chop spinach finely and set aside.

In a medium saucepan, heat butter or olive oil over medium heat. Add garlic and cook for one minute (don't let it brown). Add flour and stir well. Cook, stirring constantly until flour turns light blond and smells toasty, 1 or 2 minutes.

Whisk in the 1/2 & 1/2 or substitute, little by little, until the mixture is smooth. Keep cooking until the mixture comes to a boil and thickens, 2 or 3 minutes.

Reduce heat to low and simmer, stirring, for 4 or 5 minutes.

Add parmesan or substitute, lemon juice, salt, paprika, oregano, basil, and thyme. Stir well to combine.

Remove from heat. Add the sour cream or substitute and chopped spinach.

Serve with tortilla chips or whatever you like to dip.


Monday, November 19, 2012

Fast Food


I have many, many reasons for teaching my sons to cook; some that cut really deep, some entirely self-serving, some purely practical, others philosophical, even political. I hope to write about them all, but the reason weighing heavy on my mind right now is this: I want to show my kids that cooking is no big deal, it's not a pain in the ass, not a drag to be avoided, but just a normal everyday thing that you do.

I'm thinking about it a lot these days because I worry that I don't always model this attitude. I work full-time, my partner does too, and 5:45 can find us all tired, hungry, tempted to stick a frozen pizza in the oven or order Chinese delivery. I will more than happily cut myself enough slack to do this sometimes, but during especially hectic times it's easy to over-rely on convenience food and take-out, and I don't like how I feel when we're eating like that too much, or what I'm communicating to my kids (that cooking doesn't fit into a busy life, that cooking is a lot of trouble...)

So I'm cultivating weeknight dinner ideas, looking for simple, from-scratch vegetarian meals that don't take much longer - or much more effort - than frozen pizza. Here's one, not the fastest one, but doable in thirty minutes, easy and adaptable, and particularly satisfying on a chilly fall evening:

Noodles and Vegetables in Broth 

8-ounce package udon or soba noodles

8 cups water

Approximately 3-inch piece of kombu sea vegetable (optional but highly recommended)

4 dried shiitake mushrooms

6 tablespoons soy sauce

3 tablespoons mirin or cooking sherry

pinch dried ginger (optional)

pinch cayenne pepper (optional)

1 lb spinach, washed and chopped - or use pre-washed baby spinach

2-3 medium carrots, sliced into thin rounds


For the vegetables and noodles: Put a large pot,  3/4 full of water, on high heat.

For the broth: In another large pot, combine 8 cups water, optional kombu, and shiitake mushrooms. Bring to a boil, reduce heat to medium, and leave to a strong simmer for 15-20 minutes while you prepare the noodles and vegetables.

When the pot of plain water comes to a boil, add carrots. After one minute, add spinach. Cook one additional minute. Scoop the vegetables out of the pot (don't dump the water out - you're going to cook the noodles in it) with slotted spoon or strainer. Set aside.

Add noodles and cook according to package directions.

Drain noodles, rinse in cold water, and divide between four deep bowls.

Finish the broth: Remove mushrooms and kombu. Discard kombu. Squeeze water out of mushrooms and slice very thin (discard stems). Return mushrooms to pot. Add soy sauce and mirin. Taste and adjust seasoning (add optional powdered ginger and/or cayenne pepper, especially if anybody has a cold), and heat gently until steaming.

Add cooked vegetables to noodles, pour broth over everything, and garnish however you like - seeds are good, scallions are good, toasted sesame oil is very good.

Henry took thorough notes on this recipe. I'm hoping to someday walk in the door at 5:45 to find bowls of hot noodles and broth sitting on the table, waiting for me. I can't help it, I'm an optimist.

I told you some of my reasons for teaching my sons to cook are self-serving.

Tuesday, November 6, 2012

The Tao of Broccoli

My partner Jake has a way of making things look easy. We've been married nineteen years, and even I will periodically find myself saying, "Wait, you have ANOTHER book out?" 

During our early years together we were both musicians, and it was exactly the same - he'd disappear into the basement for a bit and emerge with a cassette tape of perfect pop gems, fully arranged, with drum beats, bass lines, vocal harmonies and tasteful tambourine tracks.

Also, you should see his broccoli florets. Mine always turn out hacked and knobby, his are perfect little trees, and he doesn't even look like he's trying.

I'm teaching Henry how to cook, but I asked Jake to teach him how to floret, and Jake - in professorial mode - referred Henry to a story from Chuang Tzu about Cook Ting, carving an ox for Lord Wen-hui with dazzling precision.

Cook Ting explains to Lord Wen-hui that what he cares about is the Way:

"I have left skill behind me," he says. "Nowadays, I am in touch through the daemonic in me, and do not look with the eye. With the senses I know where to stop....I rely on Heaven's structuring, cleave along the main seams, let myself be guided by the main cavities, go by what is inherently so."

So that's Jake's secret, at least concerning broccoli. Henry made a slide show to document the process. Music by Jake Smith.


After Jake florets it, Henry and I cook it.

Here's our favorite recipe:

Broccoli

One large head of broccoli, daemonically floretted

2 tablespoons olive oil

1/4 - 1/2 teaspoon salt

1-2 teaspoons balsamic vinegar (optional)

2-3 cloves of garlic (optional)

Heat olive oil in a skillet or pot with a lid, add broccoli, and sauté on medium-high heat, 1-2 minutes

Add salt and optional garlic, stir, reduce heat, and cover

Let broccoli cook covered 3-5 more minutes

Uncover, stir in balsamic vinegar, taste for seasoning, and serve hot


Wednesday, October 17, 2012

Popeye, The Rock Tour, and Pesto


How to Get Your Kid to Eat Greens, Plans A-C


Plan A: The Popeye Argument. Although I love Popeye, I had to put this argument on the shelf after my usually mild-mannered son charged, fists swinging, shouting "I biffs 'em and boffs 'em" (from his favorite Popeye song) at an unsuspecting little girl strolling through the College Mall with her parents.


Plan B: The Rock Tour Strategy. This one worked for me. When Jonah was a tiny toddler, he spent a big chunk of time on tour, eating out in every kind of restaurant, and as a result he always ate his greens: sushi coated in fish eggs with a big side of spinach goma-ae; mounds of Ethiopian collard greens; spicy black bean and spinach burritos; salty collards from interstate standby, The Cracker Barrel. And he was two years old. The thing about this strategy is that although you don't have to actually go on a rock tour, or join the circus or whatever, you DO have to start when your kid is very young.


Plan C: The Pesto Approach. Teach your kid how to make pesto; let them experiment and find their favorite combinations. If he or she hates basil, it need not be involved (I don't think it's helpful to be purist about this - pesto just means anything that's been pounded into a paste). Using this flexible recipe, Henry has produced some excellent blends, including a spinach-heavy one that I hereby dub "Popeye Pesto."

Pesto

2 well-packed cups basil, parsley, spinach, arugula, cilantro, or a combination, leaves only

1/3 cup olive oil

1/2 cup pine nuts, walnuts, brazil nuts (really good), sunflower seeds, or other seeds or nuts

3-4 cloves of garlic, roughly chopped.

1/2-1 cup grated parmesan or romano cheese (or skip the cheese, it'll still be delicious; just add a few extra nuts or seeds and a little more salt)

1/2 teaspoon salt

1-4 tablespoons of water, depending on desired consistency

optional: pinch black pepper, dried herbs, cayenne

Combine all ingredients in food processor. Pulse until blended.


Serve with pasta, potatoes, rice, fish, soup (especially minestrone), crudités or bread. Super good on sandwiches (just add less water).

Plans D and up forthcoming.


Sunday, October 7, 2012

Marinara Sauce


As a young adult, I was weirdly afraid to attempt homemade spaghetti sauce, assumed it was a mysterious day-long process, unattainable to a novice cook. When I did finally try to make a basic tomato sauce I couldn't believe how simple and tasty it was, so much better than the jarred stuff, and it didn't take all day. A perfectly good marinara sauce can be prepared in the time it takes to boil water and cook pasta.

I taught this recipe to Henry, who at 13 is certainly not afraid of spaghetti sauce; after one lesson he insisted he had it down.

Marinara Sauce

1 28-ounce can chopped tomatoes

4 medium garlic cloves, minced

2 tablespoons olive oil

1 teaspoon oregano

1 teaspoon thyme

1/2 teaspoon salt

Heat oil in sauce pan, add garlic and sauté one minute.

Add tomatoes, salt, oregano and thyme.

Bring to a simmer and cook on medium heat, stirring occasionally, 15-20 minutes.


A couple of weeks after our first lesson, I was short on time but wanted to make lasagne. I asked Henry if he could make the sauce while I cooked the pasta and prepped the cheese. He did! In a flash, lasagne team lovesmith had this ready to go in the oven:


I'm thinking that having a live-in saucier-in-training is going to be a major boon.


Saturday, September 29, 2012

The Half-Empty Nest


I guess I could say the nest is half empty. A few weeks ago, my oldest son Jonah started college, and it has been discombobulating.

It's kind of terrible. I ran into my neighbor Bob, whose daughter is now in grad school, and we commiserated on the sidewalk. "Nobody," said Bob, "tells you how hard it is. One minute they're sitting at the table eating a bowl of cereal, the next you're driving home from some college with a broken heart." True.

But it's also kind of wonderful. Jonah is ready, he's happy, he's doing the things he should be doing and he's in a good place.

And I'm getting more sleep - no more 1 a.m. awakenings, no more late night clunking sandwich making. It reminds me of that momentous leap of long ago, from having a night-waking toddler to having a kid who sleeps through the night.

I am sleeping through the night. I hope Jonah is. I have no idea, though, and no way of knowing. Maybe he's not sleeping at all. I don't know. He could be doing anything. What was I doing when I was 18?

Did I mention how terrible this is?

I miss many things about my oldest son, but these days I especially miss our irregular Sunday evening cooking lessons. During all of Jonah's senior year, I cobbled together a cooking course of sorts, an attempt to prepare him for adult life and an excuse to spend some time with him while he was still home. It was also, I must admit, a sideways ploy to get someone other than me to make dinner once in a while.

Jonah's cooking lessons were imperfect, but I knew that from his perspective the project was a success when he claimed, shortly before his departure for college: "I now know how to cook. You don't have to worry about that." For me, it was an unquestionably valuable experiment. I only wished I'd started doing it earlier, much earlier, like when he was 13.

Which brings me to Henry. Henry, 13, is my youngest son. For the past year he has been saying things like, "When can I start MY cooking lessons?" Henry has always been impatient, always trying to catch up with his older brother. He stubbornly started to walk when he was 8 months old, before his little round baby body was even ready. I'm convinced, especially in retrospect, that this was an act of will, a major clue about the personality of a very, very determined person.

Well Henry, good news: It's your turn. Time to rattle those pots and pans.

I guess I could say the nest is half full.